A Photographer's Journey
Achieving my dream

Why is it important to know how your digital camera works?
Understanding digital cameras and knowing its functions and key parts can be very beneficial when you are learning about photography. This is important because of two reasons.
- To take full advantage of your device that will help you make the most of your investment; and
- To enable you to take the best possible pictures in any given situation and light.
It can also help you decide which camera features are most important to you when purchasing a camera, or camera lens.
This article will outline how digital cameras work and will describe its main parts and how an image is captured.
Bits and bytes
Conventional cameras depend entirely on chemical and mechanical processes – you don’t even need electricity to operate them. On the other hand, all digital cameras have a built-in computer, and all of them record images electronically. This essentially means an image is represented in a language that computers recognize, i.e. bits and bytes, which is just a long string of 1s and 0s that represent all the tiny coloured dots – or pixels.
At its most basic level, this is all there is to a digital camera. It has a series of lenses that focus light to create an image of a scene. The light is then focused onto a sensor that records it electronically. A computer then breaks this electronic information down into digital data. All the fun and interesting features of digital cameras come as a direct result of this process.
The external parts of a digital camera
Camera lens
One of the most vital components of photography is the camera lens. At its simplest, a lens is just a curved piece of glass or plastic. It allows the beams of light bouncing off an object to enter the sensor, so they come together to form a real image – an image that looks just like the scene in front of the lens.
There’s a wide range of options to choose from and depending on the type of camera you own you may have either a fixed lens or an interchangeable one. I will discuss lenses in more detail in a future post, but these are the different options:
- Standard/Kit Lens
- Prime Lens
- Macro Lens
- Telephoto Lens
- Wide Angle Lens
- Specialist Lens
The lens’s field of view is determined by its focal length. This is the length, in millimeters, from the rear nodal point of the lens to the image plane (sensor). Some lenses have fixed focal lengths, while others have adjustable focal lengths. The focal length determines how your photos will look, and the range at which you’ll be able to capture your shot. As a vague guide, this is how different focal length ranges compare:
- 8mm – 24mm: Ultra-wide angle
- 24mm – 35mm: Wide angle
- 35mm – 85mm: Standard and Prime
- 85mm – 135mm: Short telephoto
- 135mm – 300mm: Medium telephoto
- 300mm+: Super telephoto
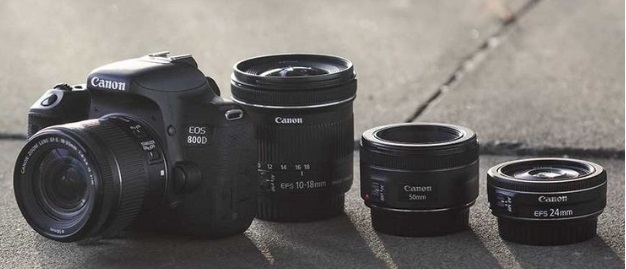
Camera body
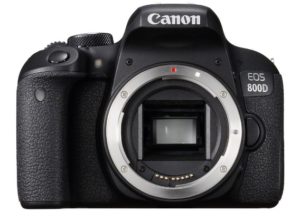
The body of your camera is a light proof box that houses all the key components. The controls for exposure settings and other effects are located on the camera body and the camera shutter and the image sensor are located inside the camera body.
Bodies can be several shapes and sizes. DSLRs tend to be larger bodied and a bit heavier, while there are other cameras such as point-and-shoot that are a conveniently smaller size and even able to fit into a pocket.
Shutter release button
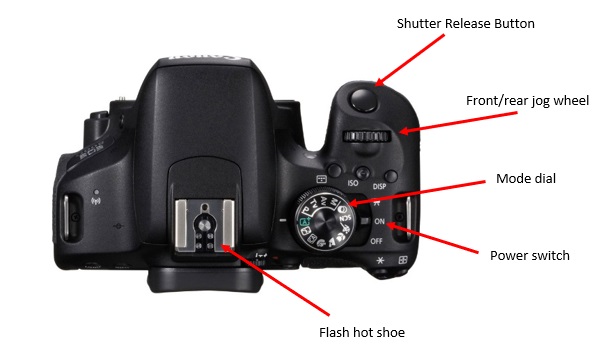
The shutter release button is the mechanism that “releases” the shutter and therefore enables the ability to capture the image. Pressing the button half-way down activates the focus on the subject that you are pointing at and then pressing the button all the way down takes the picture.
Mode dial
In order to select the different settings and modes that your camera is capable of, the mode dial is used. It’s often prominent near the shutter release button and allows you to switch between Program, Aperture, Shutter and Manual modes, as well as using some preset settings such as landscape and macro.
Front/Rear jog wheel
Depending on your camera you may either have a rear wheel or a front and rear wheel. The primary purpose of these dials is to allow you to change the shutter speed or aperture. Your camera’s menu will have options to change what these dials do, for example, you might want to reassign the front dial to changing ISO.
Flash hot shoe
Most cameras will come with a built-in or pop-up flash these days. For those that don’t come with one like the higher end DSLR models, or if you need more light than the pop-up flash can provide, you can attach an external flash to the hot shoe that sits above the viewfinder. Some beginner-level digital cameras do not have hot shoe units.
Power switch
Used to turn the camera on and off.
Multi selector
This is the big joypad style dial on the back of your camera. It will have four directional pads and a central button which typically functions as an OK button. This allows you to accept settings when using the camera’s menu. In the menu, you use the directional pads in a similar way to a mouse to navigate through the various options.
Menu button
This allows you to access the full menu hierarchy via the LCD screen on your camera’s back.
Zoom In/out
These buttons allow you to zoom in and out of a picture that you’re reviewing on the LCD screen after taking it. Pressing the zoom out button when reviewing images will bring you out to a screen of thumbnails where you can navigate to an individual image that you wish to look at.
Preview button
This is the button that looks like a play button on a video recorder. When pressed, it will preview the last taken image on the screen. You can use the direction pads to navigate to previous images and the zoom buttons to zoom into the image or to zoom out to thumbnails.
Record/Live view
This button will switch on the live preview mode, allowing you to see the scene in front of you live on the camera’s LCD screen. You can also use the button for video recording.
Viewfinder
The viewfinder is a small window on the back of the camera that allows you to look through and compose your image. The benefit of using a viewfinder instead of looking on a digital LCD screen is that external light is reduced. This allows you to see the subject and scene in the truest light and without distraction. Some cameras, such as point and shoot cameras, don’t have viewfinders. Instead, they have an LCD screen that can be used to compose the image.
LCD screen
Just about all cameras manufactured these days have LCD (Liquid Crystal Display) screens that will allow a whole host of functions to be accessed. You will be able to see and compose your image before taking the picture using a “live mode”. You can review images you have taken and see information like the histogram on there. Often this is also the screen that will allow you to see and choose your settings.

Flash button
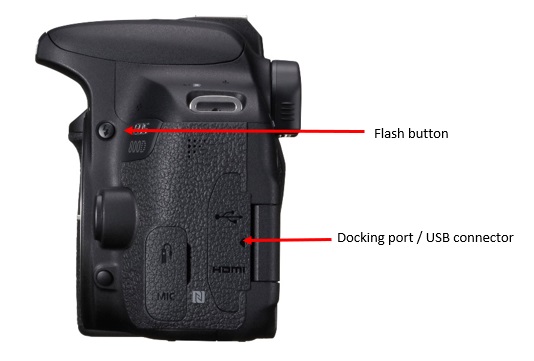
Pressing this will manually pop up the camera’s internal flash.
Docking port / USB connector
You attach a USB cable here and connect it to your computer to download the photos you’ve taken. To your computer, your camera looks like just another memory device (like a hard drive).
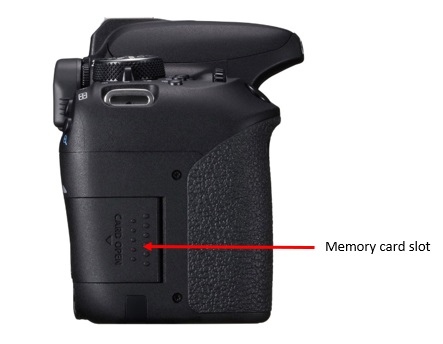
Memory card slot
You slide a flash memory card in here for saving your images. The memory card stores all the image information, and they range in size and speed capacity. The main types of memory cards available are CF and SD cards, and cameras vary on which type that they require.
Battery compartment
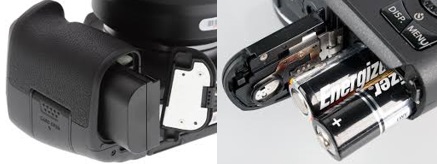
Depending on the type of digital camera you have, the battery compartment will be in varying places on the camera. EOS digital cameras come with a rechargeable battery and accompanying battery charger and point-and-shoot cameras usually uses standard AA batteries.
Tripod socket
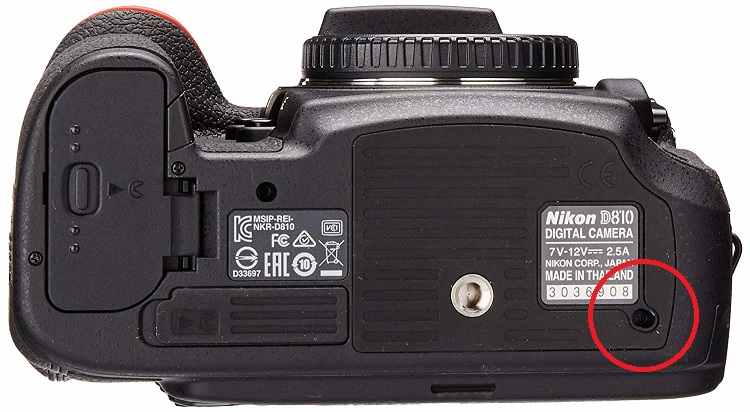
Often if you want to capture the best possible photo, in the best possible light, you will need a tripod. If you turn your camera over the hole, you see at the bottom is where you can attach your tripod to your camera.
The internal parts of a digital camera
Shutter
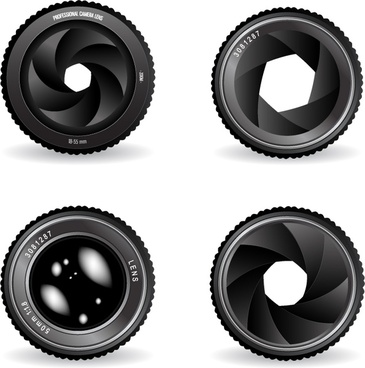
When the camera’s shutter release button is pressed, the camera shutter opens for a predetermined amount of time and any light flowing into the camera lens is directed through the lens aperture and the open shutter to the camera’s image sensor.
The shutter is a complex mechanical (or electrical) system. Mechanical cameras may have leaf or focal-plane shutters. The leaf shutter opens and closes like the aperture diaphragm and the focal-plane shutter uses “curtains” that work like garage doors.
Mirror
The camera has a slanted mirror positioned between the shutter and the lens, with a piece of translucent glass and a prism positioned above it. This mirror reflects the light from the scene or subject in front of you to the viewfinder. When you press the shutter button, this mirror flips up and back down again to expose the sensor to the light, hence capturing the image.
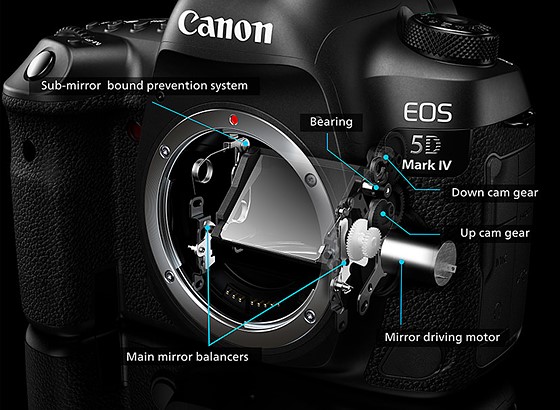
Image sensor
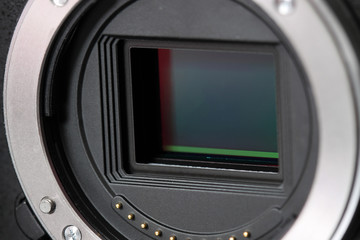
As mentioned above, the lens allows light to enter the sensor, and it’s this sensor that determines the final quality and resolution of your images. The image sensor is basically a micro-chip with a width of about 10mm. The chip consists of arrays of sensors, which can convert the light into electrical charges. Though both CMOS (Complementary Metal Oxide Semi-conductor) and CCD (Charge Coupled Device) chips are very common, CMOS chips are known to be cheaper. But for higher pixel range and costly cameras mostly CCD technology is used.
The image sensor has a grid with millions of microscopic light information gathering elements called pixels. There are one million pixels in a Megapixel. Each photographic image consists of millions of pixels. In general, the more pixels in a picture, the better the quality of the image.
There is a variety of image sensors that are available, and as a rule, the bigger the better (and more expensive). Larger sensors have larger pixels and can reproduce colours as well as shadow areas more accurately. The sensor also affects the type of lens that you can use with your camera, as well as the relative focal length.
The process of capturing a picture
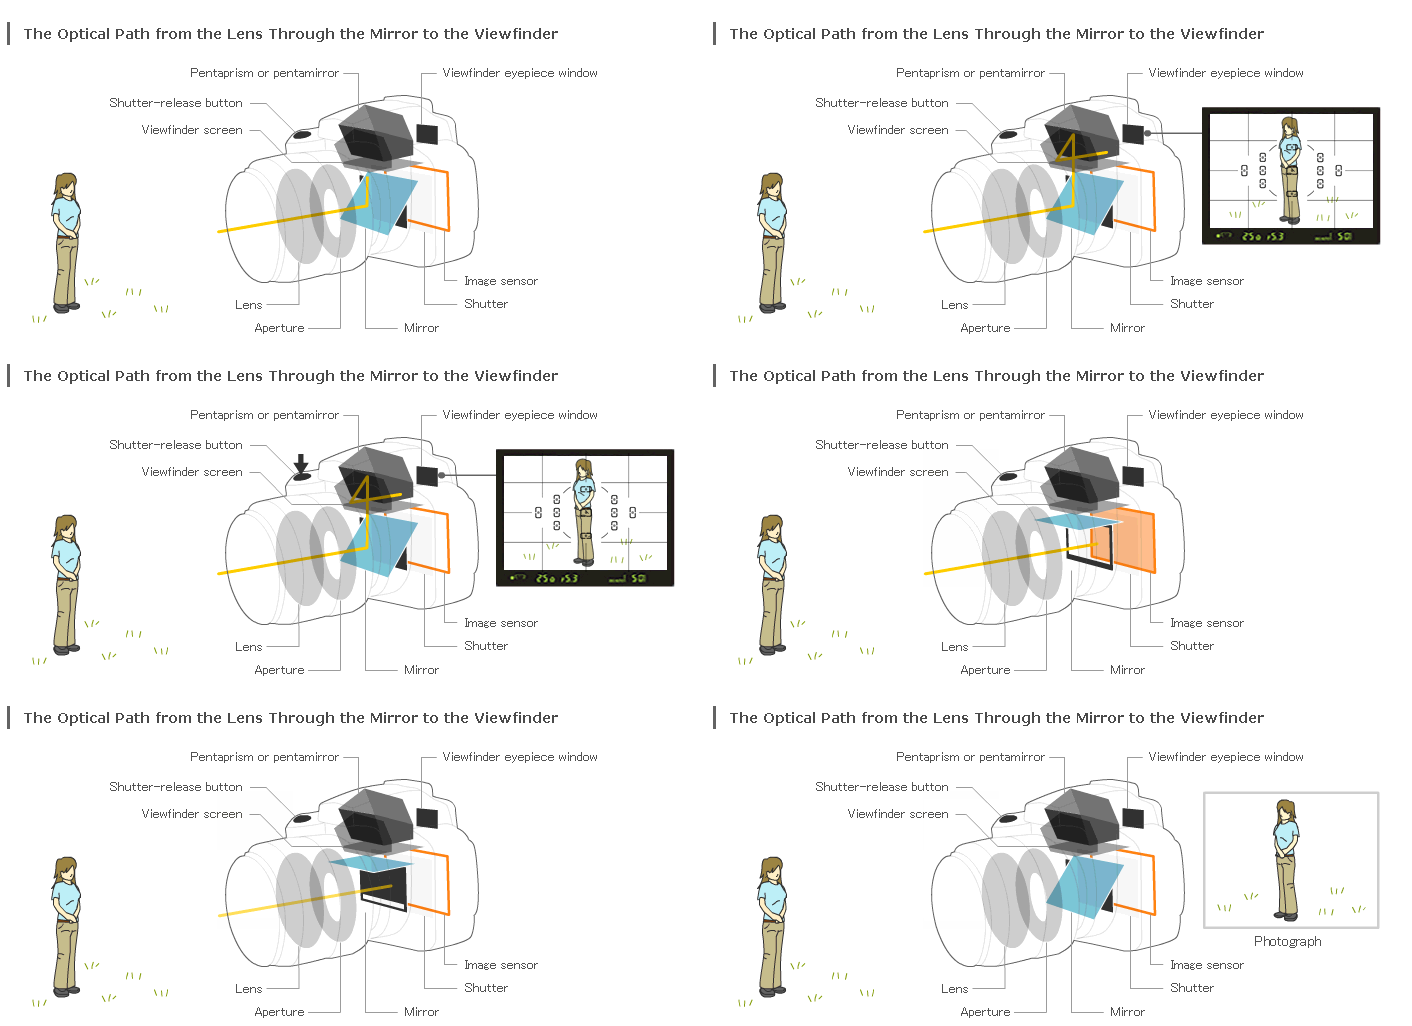
The above components and parts are what digital cameras are made of. Now, let’s briefly look at the process of capturing a picture with a DSLR camera:
- The image is viewed through the viewfinder: A predicted demonstration of the photo that is supposed to be captured is displayed through the viewfinder of the camera. In most cases the image as seen through the viewfinder will be the same as the picture that will be captured. Therefore, adjusting the object through the view of an eyepiece is important.
- The lens is adjusted (automatically or manually) until the subject is in focus.
- As the shutter release button is pressed, the shutter is opened to allow light through to the digital sensor inside the camera. The amount of time it’s open is determined by the shutter speed; typically, the less light there is, the longer it needs to be open. The amount of available light and how long and how wide the shutter is open will affect the end result.
- An array of photosensors on the digital sensor detects the pattern and amount of light that enters. It takes the reading of the light regarding the colours, intensity, temperature, contrast etc. and forms a negative version of the image. The camera’s processor then instantly develops the image and stores it on the camera’s memory card. At the same time, in modern DSLR cameras, the image captured can be instantly shown on the LCD screen.
Although there are many factors that impact this process, this is essentially how a digital camera works.