A Photographer's Journey
Achieving my dream

Pointing a camera at a subject and shooting is easy. Becoming a photographer not so easy. There are so many things to understand and learn to be able to point the camera and shoot an image that truly satisfies the artist in you.
From my own experience I have been putting off starting on this journey because of a fear for all the technicalities. But now that I am on this journey, I am so excited and should you wish to start on this path, do not let the difficulties dissuade you!
In my previous post I discussed how to get started. In this post I am providing information on basic photography for beginners. Hope you will find it useful.
What digital camera to buy?
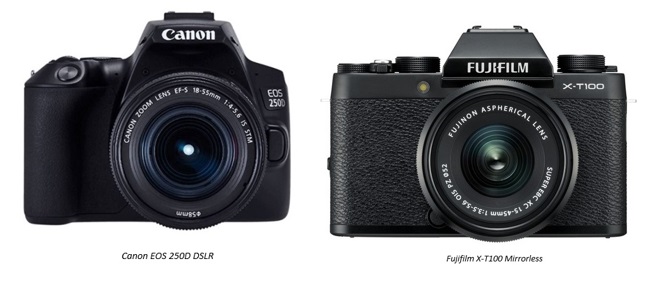
Probably the first question that comes up is what digital camera to buy – there’s only so much you can achieve with a fixed-lens compact camera or a smartphone, so the logical step for anyone ready to take their next steps in photography would be to invest in a cheap DSLR camera or mirrorless camera.
These cameras have much larger sensors than smartphones and point-and-shoot compact cameras, and they take interchangeable lenses, so you can experiment with a much wider range of photographic styles and subjects as you learn. Key factors to consider will be weight, size and cost, of course. We will cover camera options in a later post.
Which lenses do you need?
Buying a second lens is always a big step forward for any beginner photographer. It means you have grown out of the limitations of the kit lens, the lens which came along with the camera, and are ready and willing to explore the creative possibilities that a new lens brings.
A new lens is always a fresh new perspective, and in my own experience opens a whole new range of possibilities to take your photography to a new level.
There are 5 types of lenses the beginner photographer could consider depending on what your needs are:
- Kit lens: 18-55mm f/3.5-5.6
- All-around zoom Lens: 24-70mm f/2.8
- Wide angle lens: 11-24mm f/2.8 or 14-24mm f/2.8
- Telephoto zoom: Range of 70-200mm f/2.8
- Fast prime lens: Such as the 50mm f/1.8, 35mm f/1.8, and the 85mm f/1.8
More on lenses in a later post.
Memory cards – enough of them!

Memory cards are the common standard media that cameras use to store what they record, and you’re going to want to have plenty of them available always when you’re shooting.
But which to choose? There are loads of brands and types of SD memory card out there, available at a wide range of different prices. Make sure you know which type of card is suitable for your camera and do some research to find the best deal.
Learn how to properly hold your camera
One of the most important things a beginner photographer must learn is how to hold a camera properly. That simply means “in a way that minimizes camera shake as much as possible.”
Remember: When the camera is shooting a photo, the shutter goes up and the sensor fills up with light. If you move while the shutter is open, the light will smear across the sensor and result in a blurry photo. No movement equals no camera shake.
The key is to bring your arms close to your body so they’re stable against your core. This will minimize camera shake and allow your hand-held photos to remain as sharp as possible.
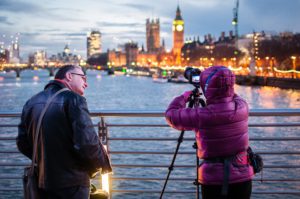
Know when to use a tripod
The tripod is sometimes underestimated in the beginner photographer’s kit. However, it can be a great asset. It keeps the camera stable, especially for low-light photography, long exposure shots, or any photography involving telephoto lenses. However, it can also be a hindrance because you must carry it around and set it up before you can take the shot. It is therefore very important to know when to use the tripod and when not.
Learn about the positives and the negatives of using a tripod, which kind of tripods are available and alternatives to tripods.
Know when to use a flash
Understanding light and lighting is part of being a good photographer. While we as photographers often love the feel of soft, natural light, knowing how to utilize artificial light can be of tremendous value in low-light environments. This includes knowing when and how to use flash, when NOT to use flash, and some ways to avoid using flash in your photos.
A very common reason to use your flash unit is low-light indoor environments. If there’s not enough light shining on your subject, a flash will help illuminate them. But flashes are useful outdoors, too, even in the middle of the day. When the background is a lot brighter than your subject, your subject will look darker or even silhouetted. Using “fill flash”, will balance out the background light and brighten your subject. Flash can also be used to create unique effects. Instead of balancing out darkness or brightness, a flash can be used to add an additional element to a photo, such as using it for light painting.
In general, there are three types of situations in which you should not use flash:
- Situations in which using a flash is pointless such as the subject is so far away that the light of the flash won’t brighten it.
- The flash causes too many undesirable side effects. For instance, when there is any reflecting surface in the picture (glass, screens, shiny objects), the light of the flash will shine right back into the camera, dominating and ruining the photo.
- Using the flash will not provide the desired effect you envisage with the photo. In low light conditions, rather take your camera out of auto and use exposure, aperture and ISO to get the correct shot.
Know how to care for your equipment
Having started on this journey as a photographer, your kit might now consist of several pieces of equipment. These pieces might have cost you a fair amount of money and it is therefore important to know how to care for them and extend the lifespan of your photographic equipment.
The following list provides some pointers to consider:
- Invest in a durable shoulder bag or backpack
- Use a neck strap, hand strap or shoulder strap to secure the camera when in use
- Clean your camera: Never use household cleaning products on your equipment!
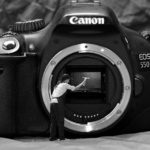 These are mostly made with nasty chemicals that will simply destroy your gear. Canned air is also something to stay away from. Camera stores advertise and sell it as a great product for getting rid of dust. The truth is that it is too aggressive for sensitive equipment. You should also keep in mind that different parts of your photography gear will require different tools and cleaning methods.
 - Having spare batteries is a must. But so is knowing how much charge is left in your batteries.
- A good prevention for moisture is to keep some silica gel desiccant bags in your camera bag. When close to your gear, these bags will absorb moisture and prevent condensation.
Back Up Your Photos!
Once you start filling up those memory cards and transfer your images to a computer, it is very easy to think that they are safe. However, these days it is not uncommon for hard drives and other storage devices to fail. In fact, due to the nature of how they operate, they are guaranteed to wear out over time. It’s just a question of when. They can also get stolen or the photos accidentally deleted with a few clicks of the mouse. Before the unthinkable happens to you and you lose all your images, it is best to create a backup strategy.
One of the best ways to approach backing up your data is the 3-2-1 strategy:
- 3: Have three copies of your data.
- 2: Keep them in two separate places.
- 1: At least one must be offsite
Some options to consider:
- External hard drives

- Save your data to the cloud
- DVDs and Blu-Rays
- Print them out (just in case)
As someone who has lost data, I can confidently say that it is well worth your time to back up your data.
These pointers should guide you in the right direction. They are certainly not extensive, but I hope they will get you started. I am looking forward to going on this journey and share my experience, knowledge and skills with you as I go along.
In the meantime, have fun, shoot a lot and experiment!
Great tips on backup. I am an avid photographer myself, no, not a professional, more of a hobby of mine, and I do have a large collection of photos/pics taken over the last few years.
What I want to know is how can I monetize this hobby of mine. Where and how can I have them copyrighted so each time someone uses my pics I get a percentage of profit?
Thank you, glad you found the information useful.
There are quite a few ways to monetize photography, which is what I am aiming to do. In terms of selling and licensing your photos, you can check out the following website:
https://www.shopify.co.za/blog/how-to-sell-photos-online
Hope that helps!
Regards
Soretha
Dear Soretha
Thank you very much for your fantastic website. It is amazing that you show people where to start and what steps to make towards their amazing hobby – photography. I hope more people will know about your website and follow your guidance.
Kind regards,
Andrey
Hi Audrey,
Thank you so much! I am so excited about this journey and hopefully I can inspire some aspiring photographers!
Regards
Soretha
Excellent tips Soretha! I followed some of these when I bought my first ever DSLR camera, it is a Nikon d3300. While I don’t shoot as many photos as I should, I found a lot of what you posted to be helpful. Never knew that flash could be used effectively in an outdoor, daylight setting! Great tip on the lenses as well. I think I would like to get an all around lense instead of using the lense that came with the camera.
Hi Jerry, I’m glad you liked the tips, thank you so much for your comment! Hope you find the lens that will work for you!
Regards
Soretha
This is a great article on things to begin with – really like the information on backing up photos. I am a hobby photographer myself and have lost photos before – kept them all on an external drive and that was it and the whole drive became corrupted losing years of photos – I was heartbroken. I can’t wait to see some of your other articles that you mentioned are coming.
Hi Trish, thank you for your comment! Yes, it is extremely sad to lose photos because those are our memories. Hope you will like the future articles.
Regards
Soretha